Outside of my usual job as a front end developer, I do quite a bit of video and photography. About 3 years ago I picked up a Blackmagic Pocket 6k pro which came with Davinci Resolve Studio for free, which started my transition from Premiere Pro to Davinci Resolve. This tutorial has been a long time coming, this will be reflective of how I approach my editing, and I want to try and condense 3 years down into a managable article. So lets get to it.
Getting Started
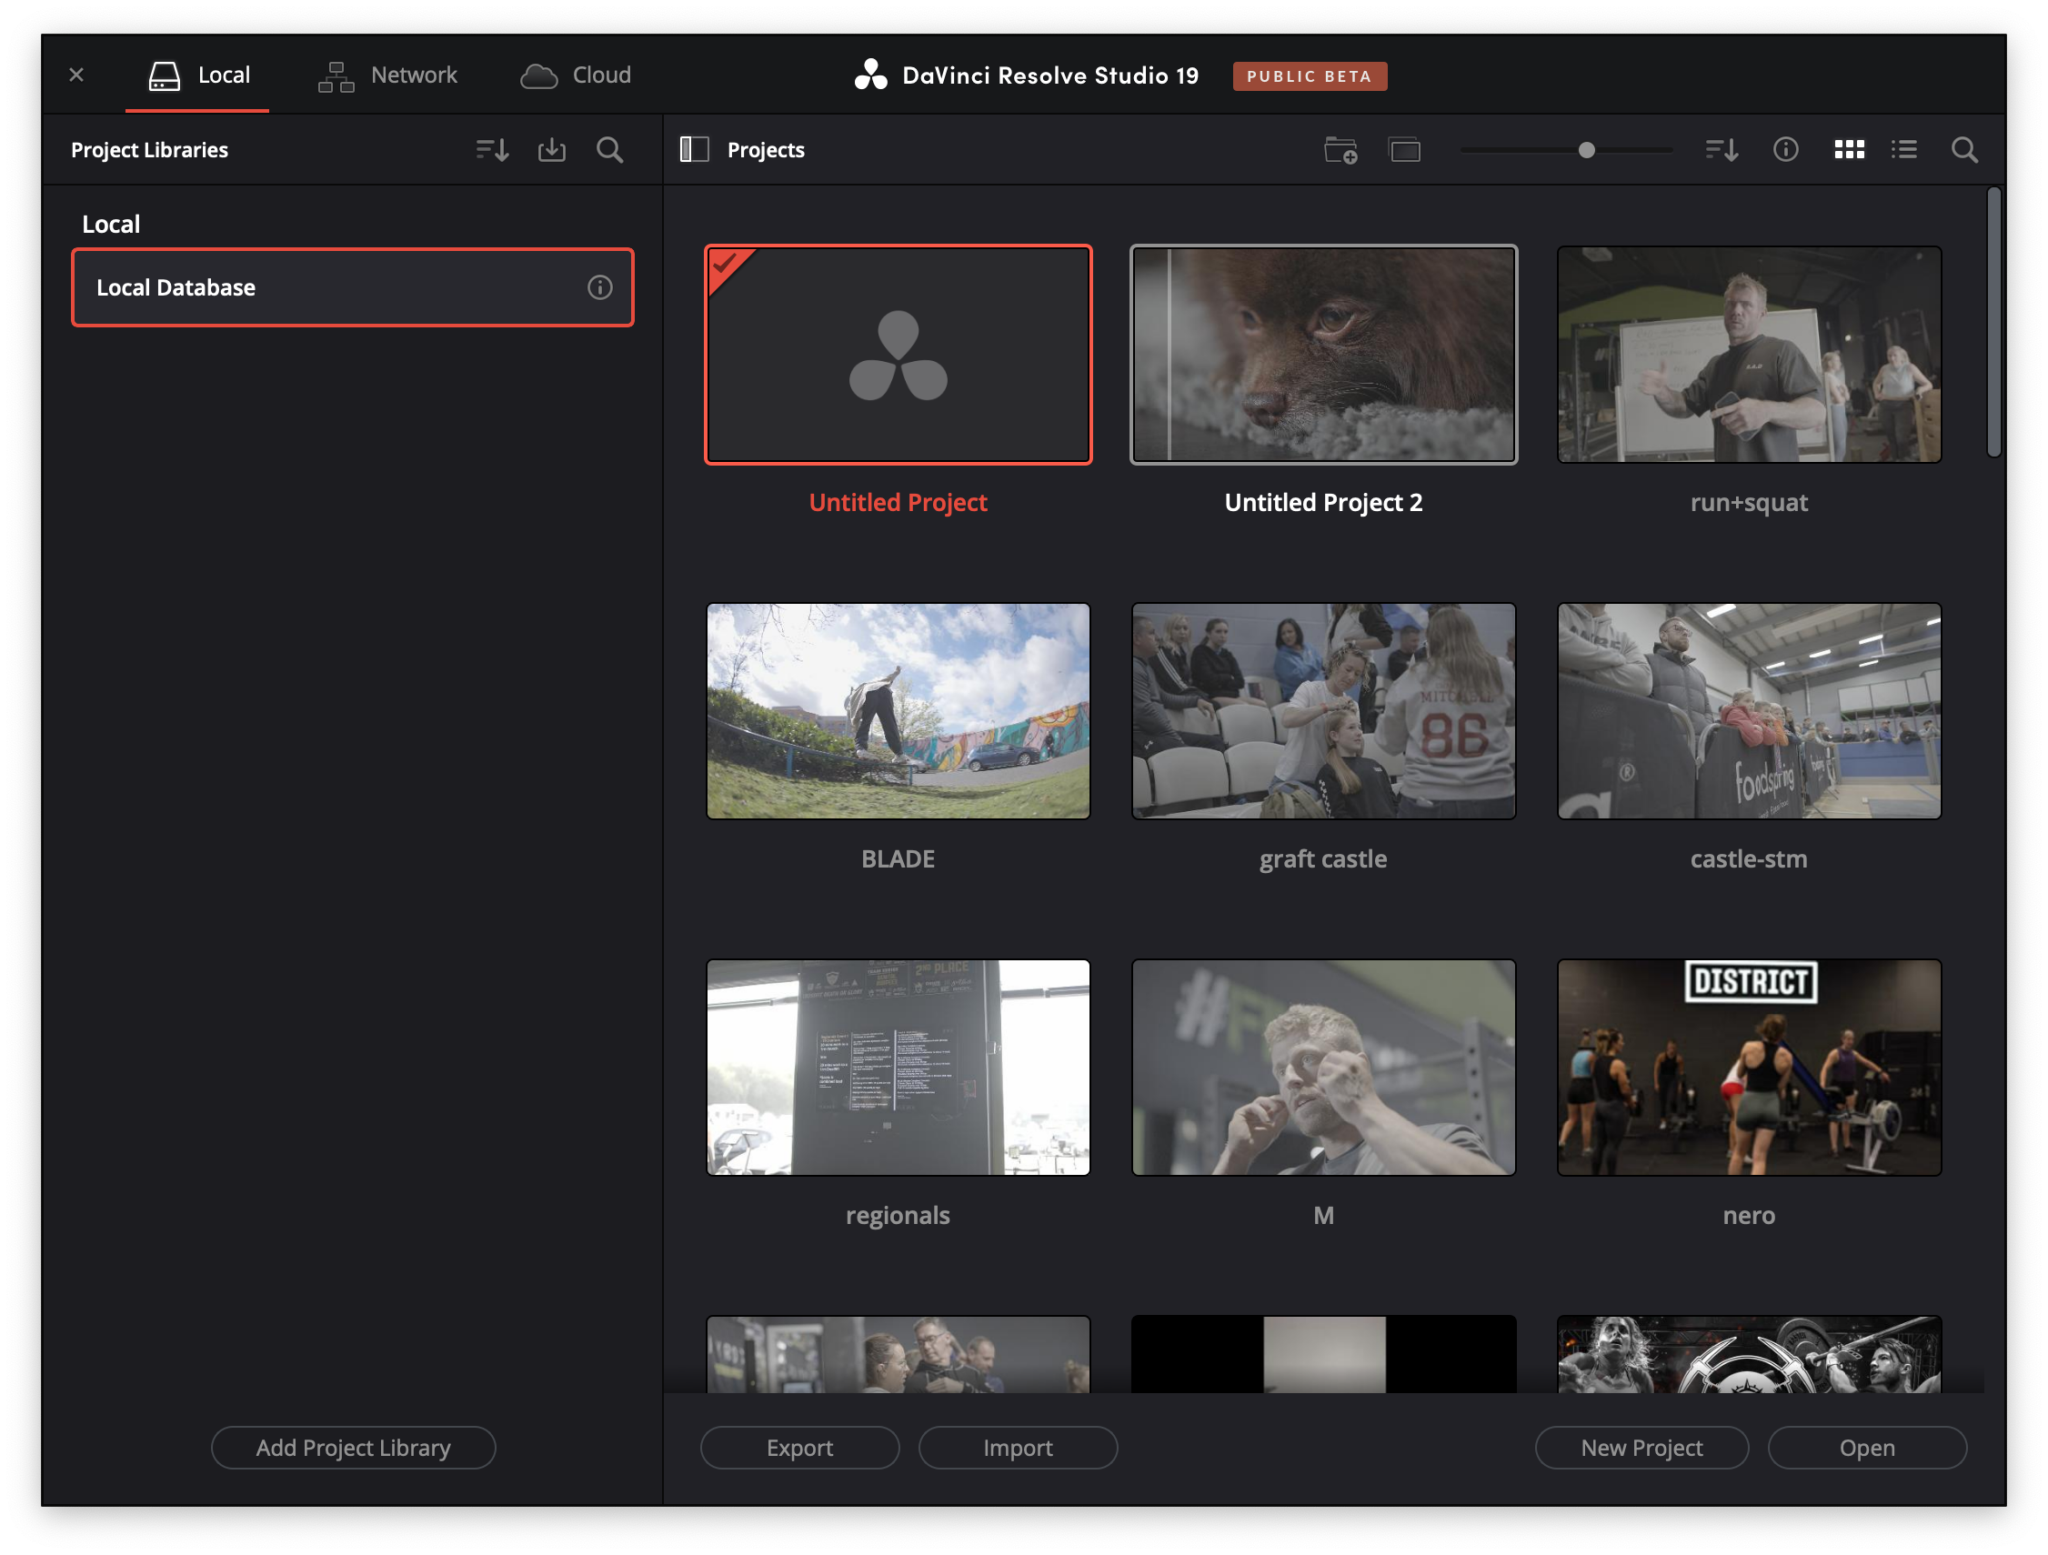
Once you have downloaded Davinci and installed it and start it up. You will see a project dialog, simply create a new project.
On the bottom tab, I recommend only paying attention to these three. Edit, Color & Deliver, if you hover over them they will tell you which one is which.

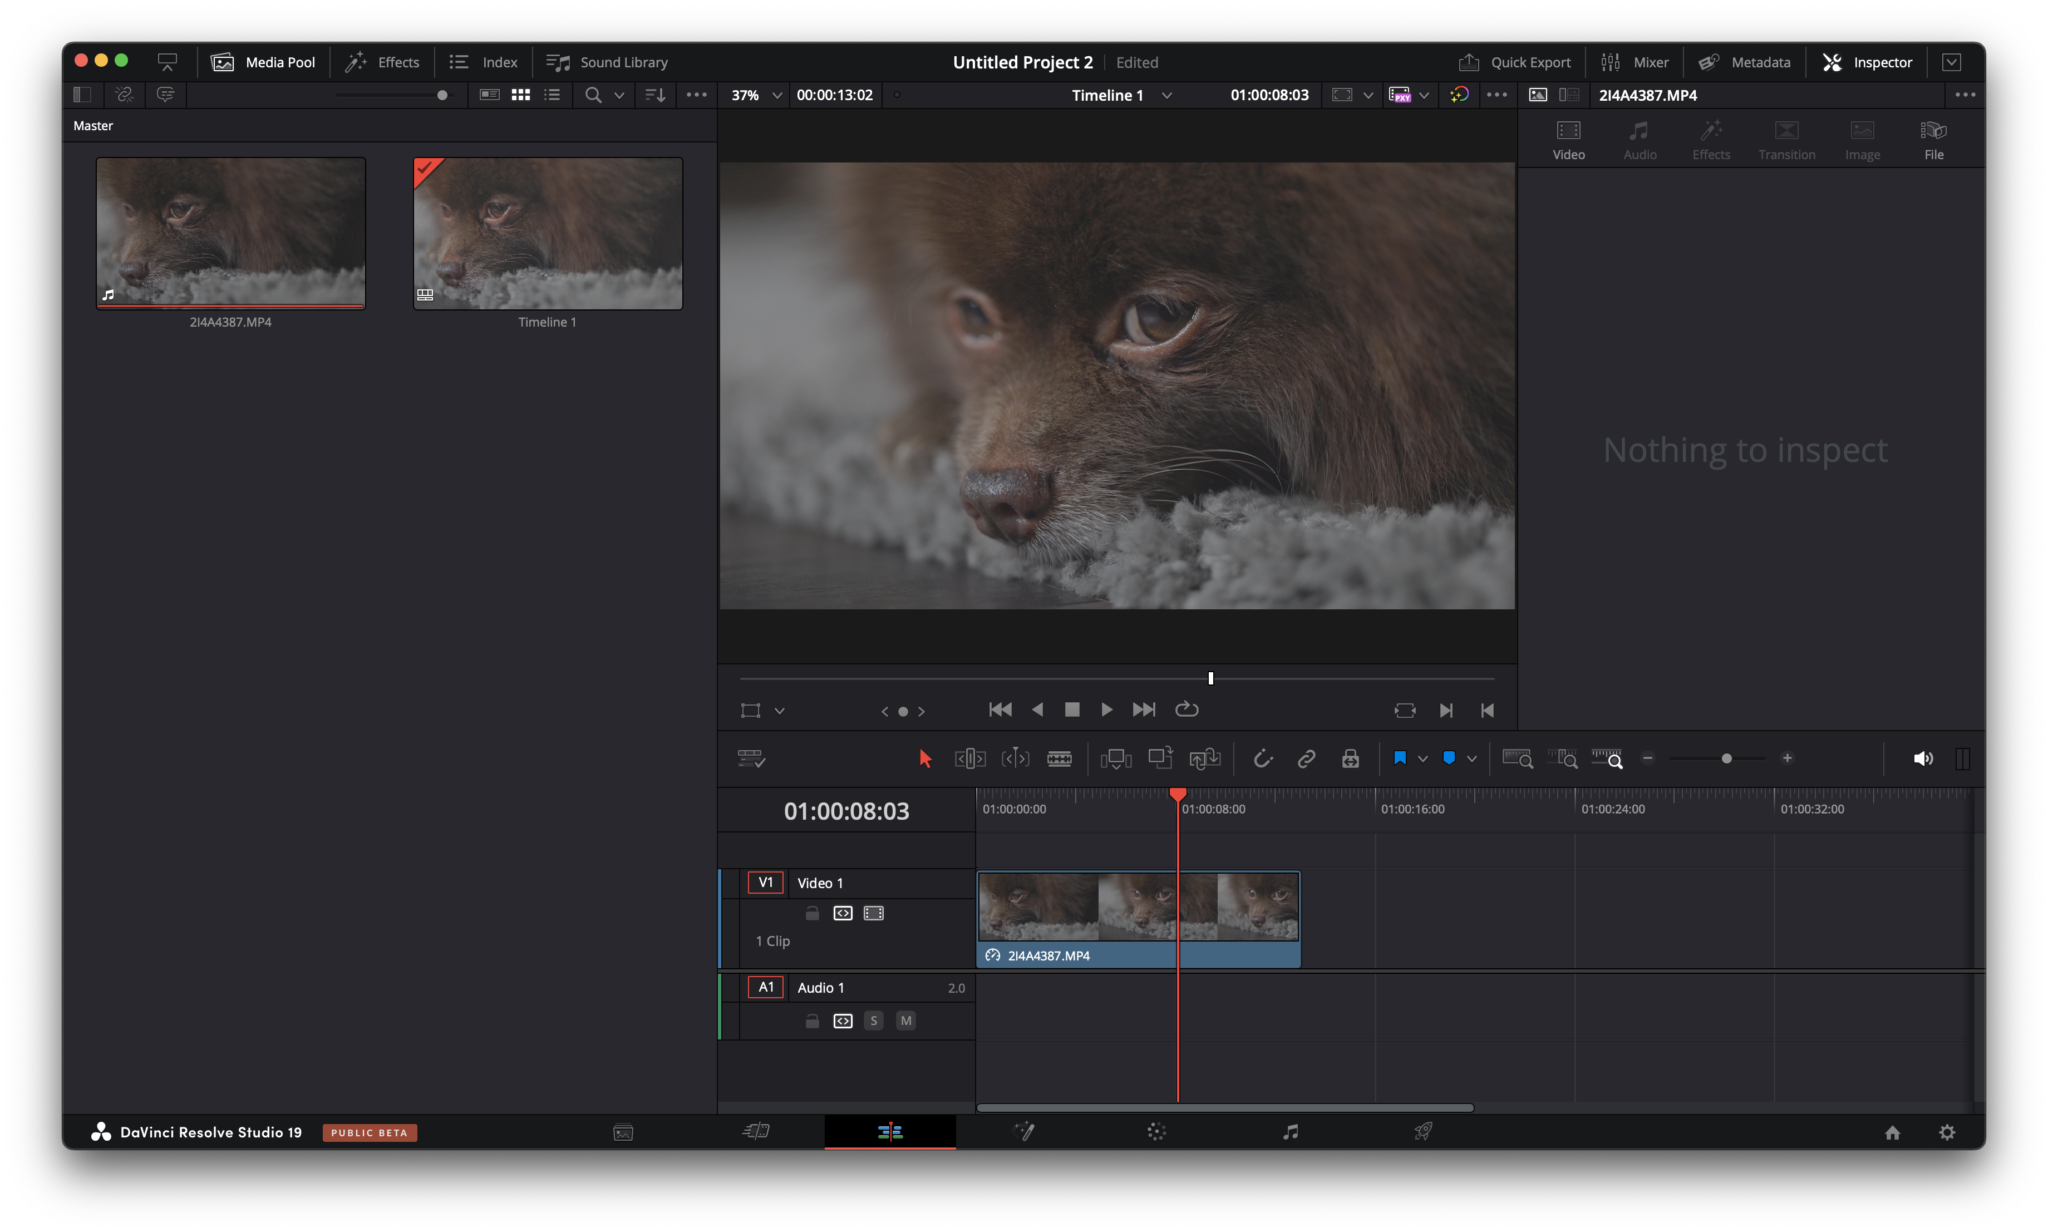
Let’s start with Edit. On the left hand side you should be able to see your media library, you can drag all your footage into here. Now lets put your first clip onto the timeline. If you have come from an application like Final Cut or Premiere Pro this view should be very familiar. You can use the cut tool (razor blade icon) to slice up your clips, or you can drag from the left or right of clip to change the length of the clip also.
Timeline Settings
Once you have a clip on your timeline, you will have a “timeline” item in your media library, depending on what you want to achieve with your edit, you could leave a lot of this as the default. But let’s go through it so you can see what you can do here. If you right click the timeline and navigate to timeline settings, you will be greeted with another dialog. Uncheck the box of “use project settings” on the bottom left. The first thing that is pretty neat is you can check “use vertial ratio”, which will change your timeline to be more suitable for a platform like Instagram or TikTok, by doing this, it means you don’t have to resize your clips manually, it will automatically fill the space of the timeline.
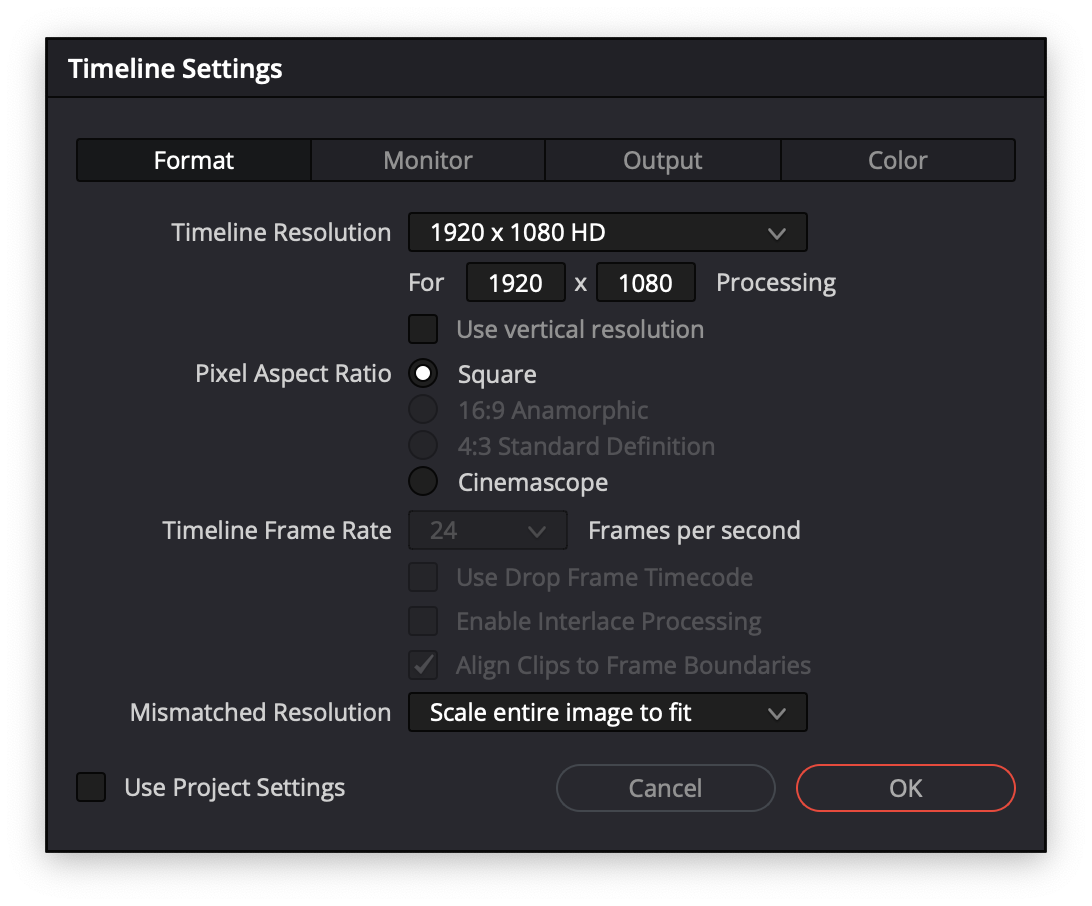
You may need to adjust them slightly but we will go over that later. You will also be able to change your resolution here, by default it is set to 1080p, you can easily change this to 4k by choosing that from the drop down. You will also be able to see where you can adjust the frames per second on the timeline as well.
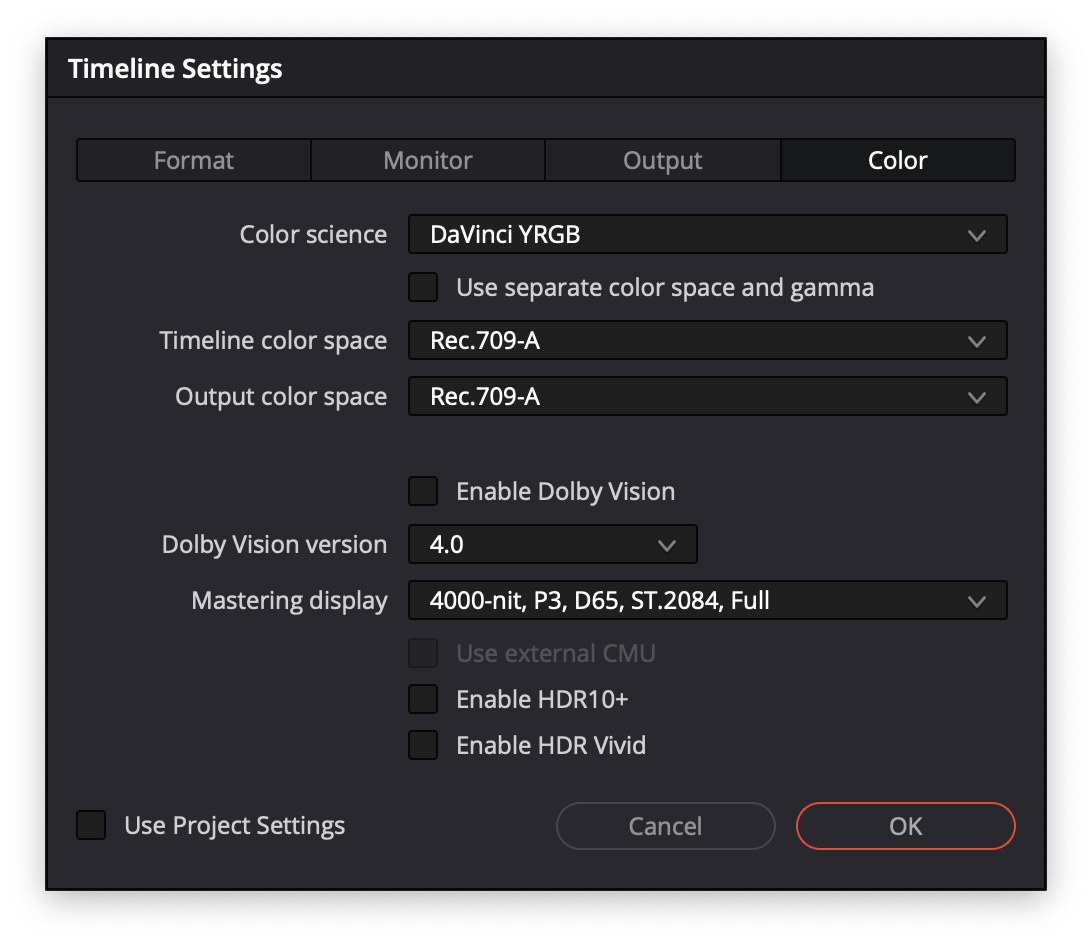
So not to go into nerdy colour stuff right away, but you may notice that your exports look different on your Mac compared to your iPhone, they may look washed out compared to what you see in your timeline as an exmaple. We can change the colour space we are working in on our project here. If you change to colour and change the timeline and output to Rec709-A. Without going into too much detail this is what is required to match the timeline colours between what you see in your timeline and what the end result will look like.
Editing
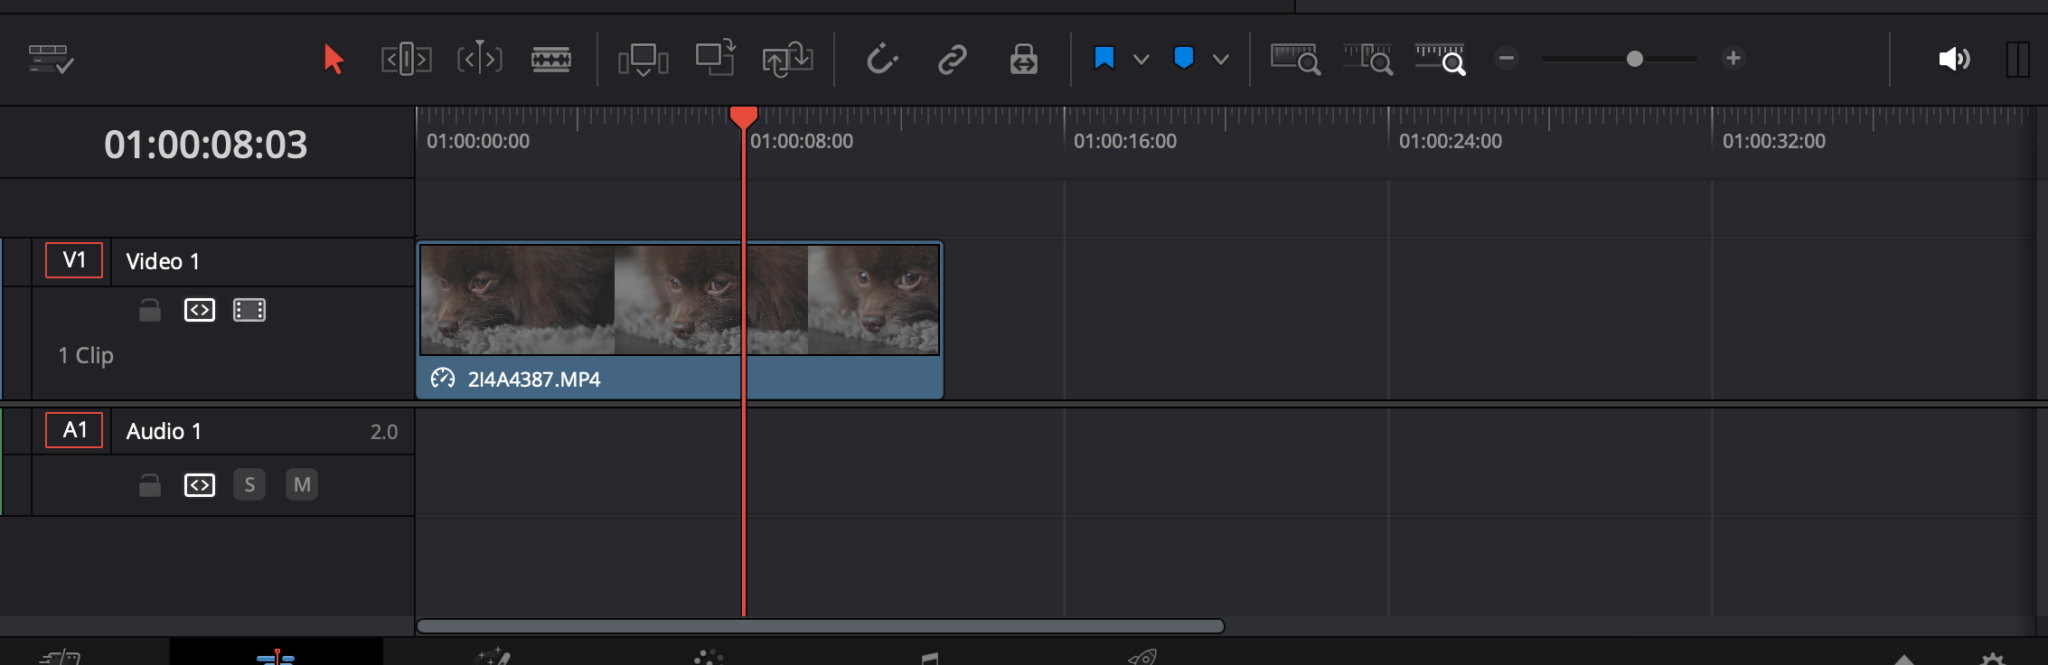
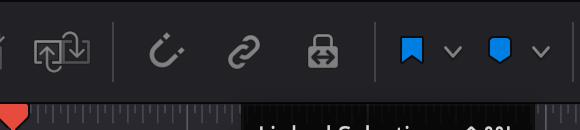
Now that you have setup your timeline, lets get to editing. If you have a few clips on your timeline you can drag and drop them where you like. By default your audio will be locked to your video clip. If you want to decouple these, simply uncheck the chain icon that is just above the timeline.
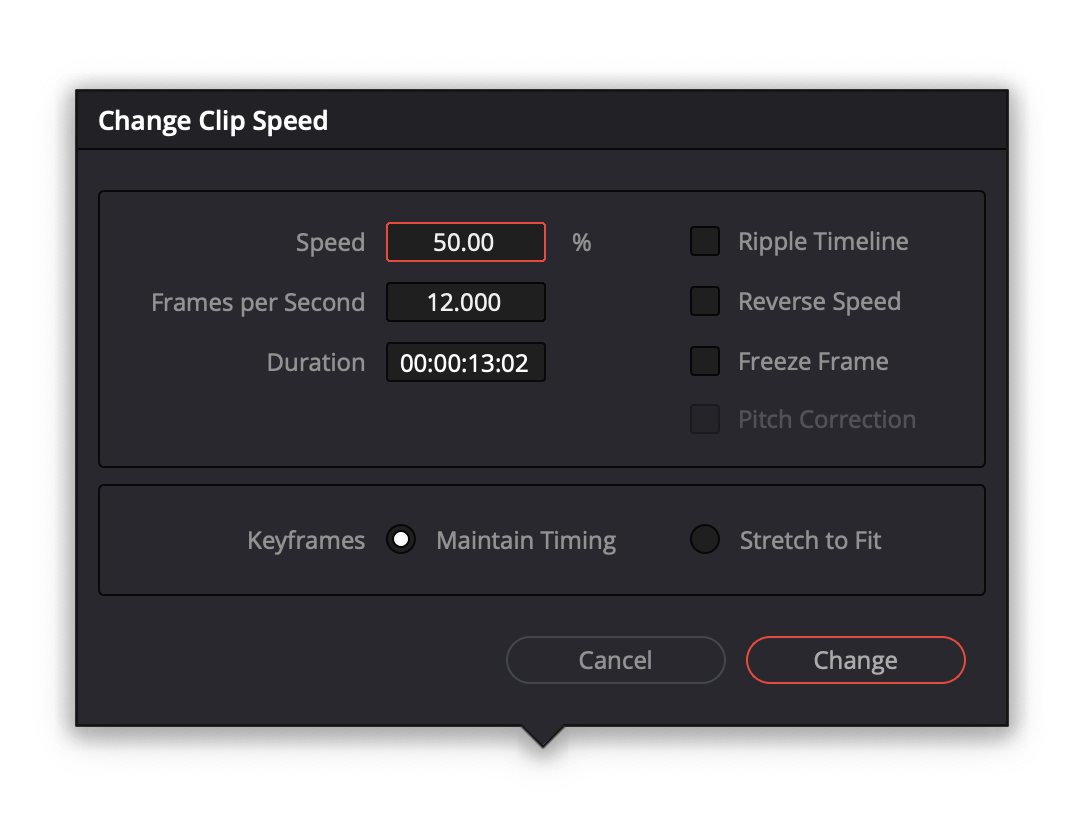
If you have slow motion clips, you can right click and press on change clip speed, so you can easily change the speed here. E.g. if you have a 60p clip you can change this to 75% and hit save. One thing to notice is your clip may not enlarge if you have already changed the length of the clip, so bare this in mind when you are slowing down the clip.
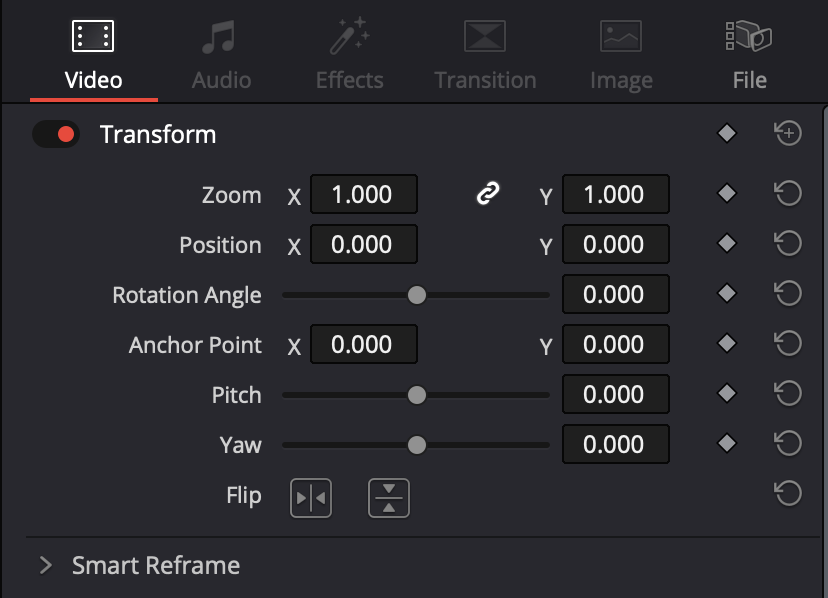
If you click on a clip, on your right hand side you should be able to see transformations, this is where you can zoom in, move your clip on the x or y axis. You will also see a diamond on the right hand side, this is how you can set a keyframe, I won’t be going into animation in this article, but this is the same principles as other applications.
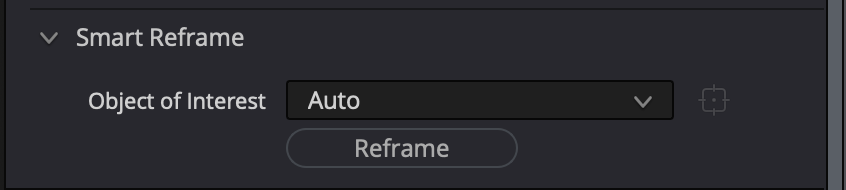
Just below these, you will see smart reframing, you can just hit the default and it will prioritise people and keep them in frame, this is especially useful when you are on a vertical timeline. If you choose reference point from the drop down you can draw a box on what you want to track and hit reframe and it should keep that in frame throughout the clip.
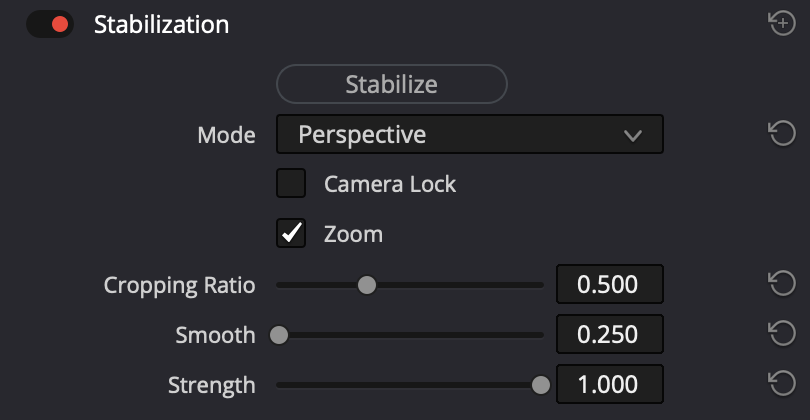
Stabilization, if you scroll down your will see that it is enabled, but if you expand the panel you can see the button “stabilize” hit that and any shaky footage should look slightly better. I haven’t often needed to play around with the setting much here.
Audio
When you click on an audio clip in the timeline the side panel will adjust to be in the audio context, so if you need to adjust the volume this is where you can do it.
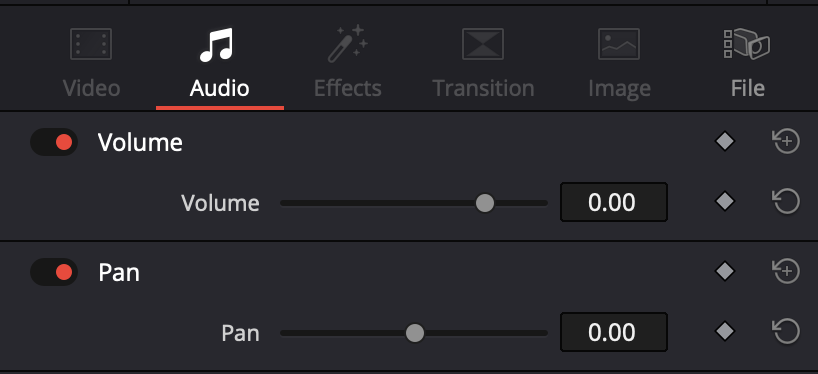
There is some nice effects you can adjust out of the box, such as isolating the dialogue on your video, just down from pan, you have this option, just enable it and adjust to your requirements.

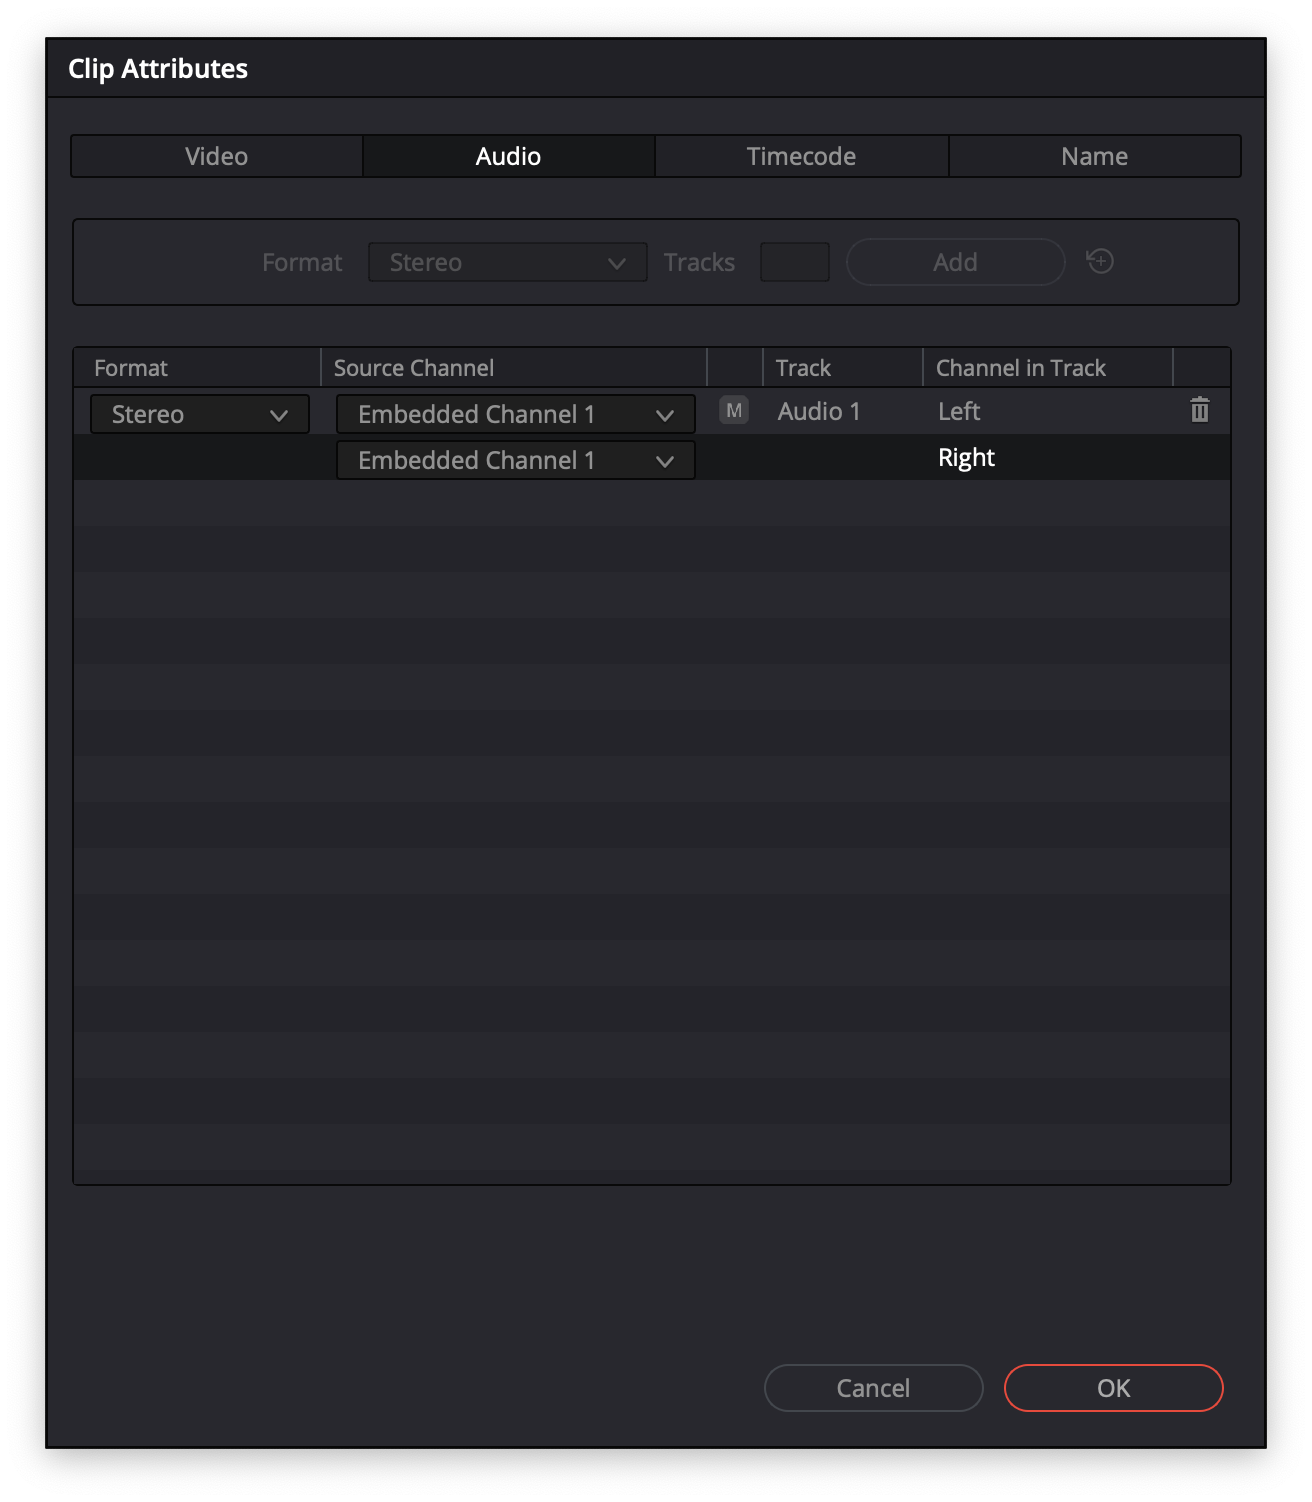
Sometimes your audio can come through as mono and you need to convert it to stereo, you need to right click your audio clip in the timeline and select clip attributes. You will see another dialog box appear, navigate to audio, ensure stereo is elected, and change the source channel to be the same as the one above it.
Lets move on to colour
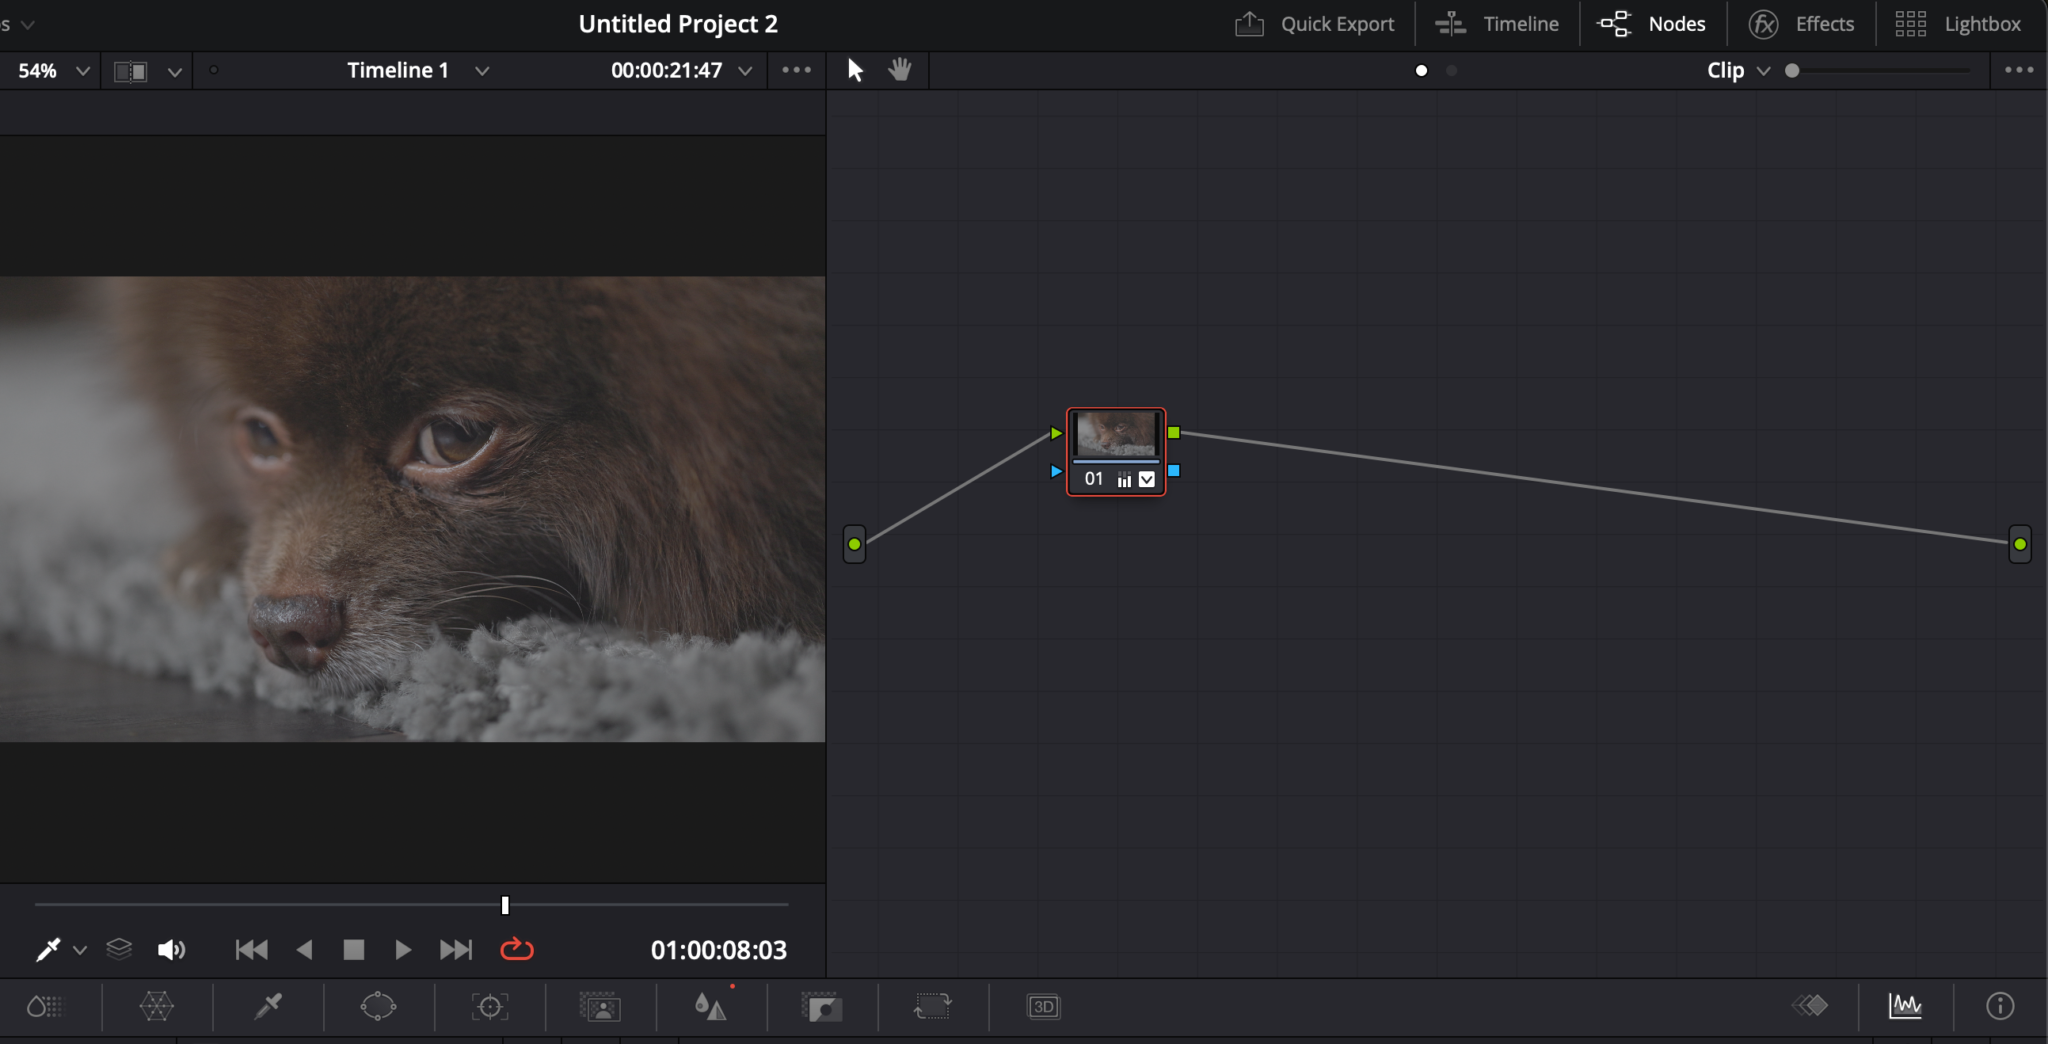
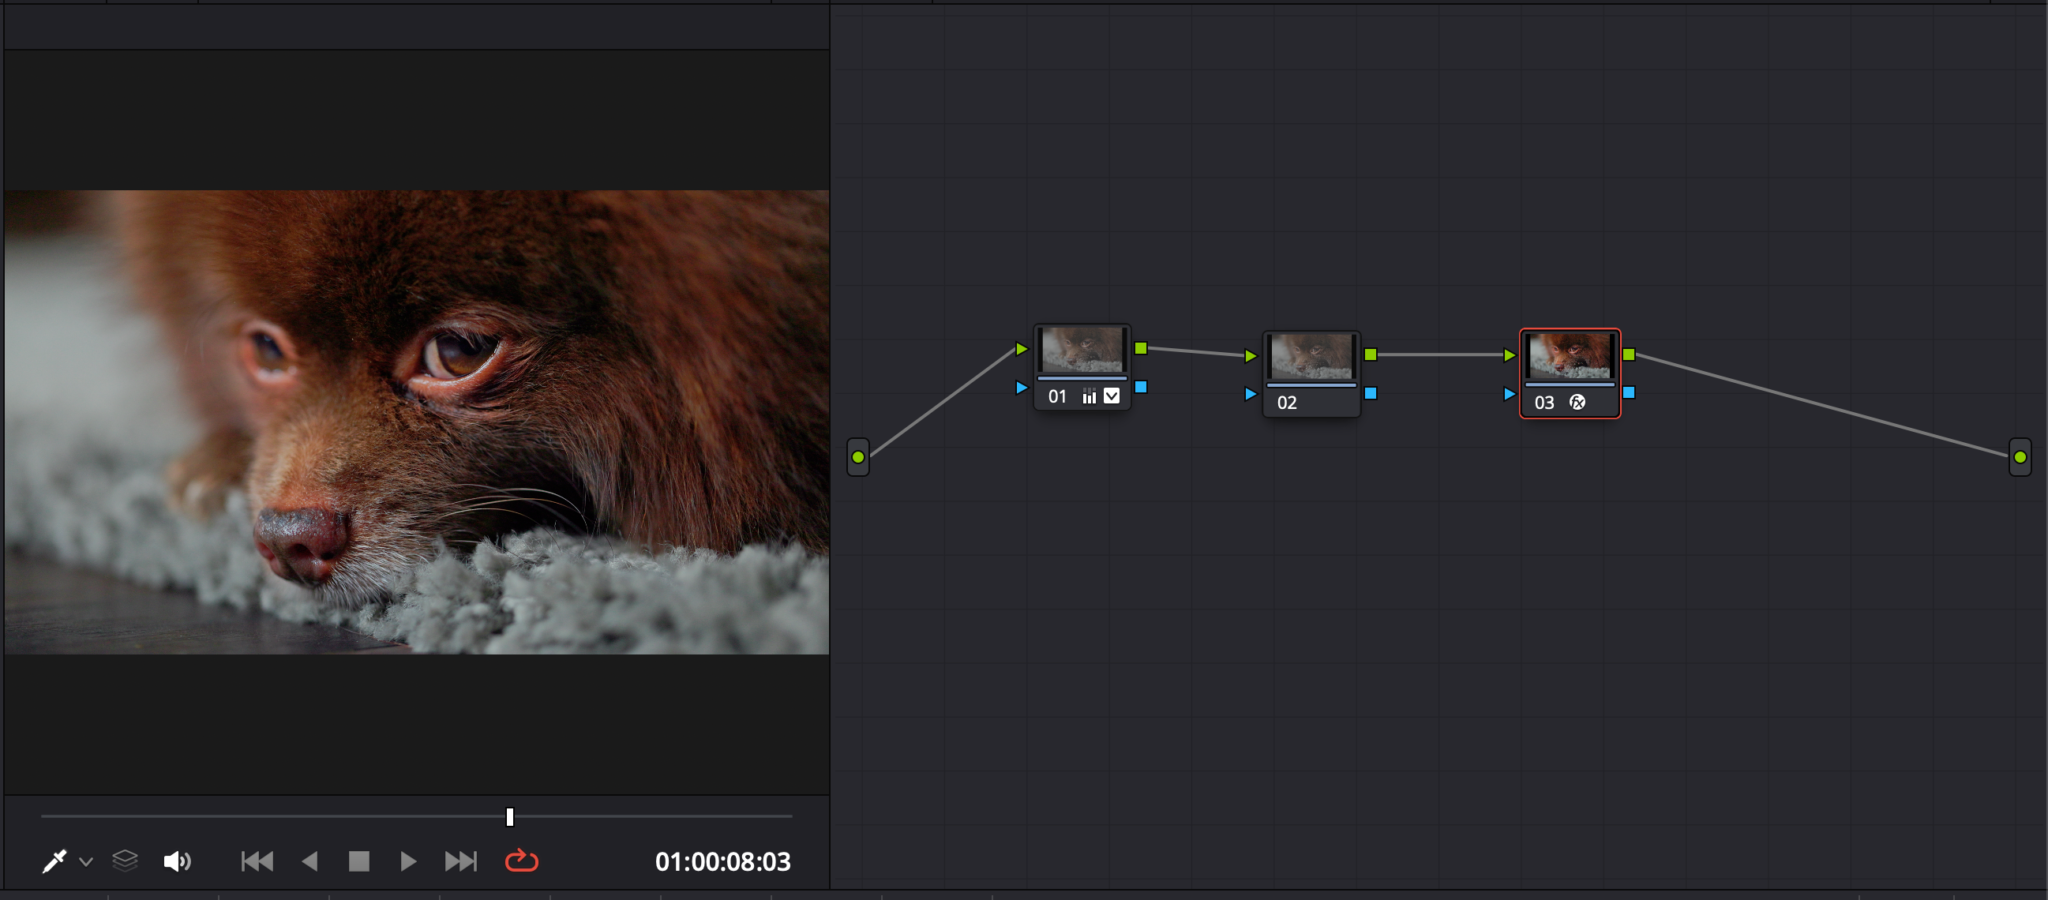
On the bottom tab navigate to colour. This might be the one that freaks people out the most as it is the least like any other editing software as Davinci Resolve uses nodes. Let me try and demistify them. On the node section you have an input and an output, so you are moving from left to right. This is very similar to the idea of layers in Photoshop except that rather than the top layer being dominant it is the right node in this instance. The reason why it is like this is because you can have paralllel nodes so the left to right makes much more sense as a visualisation.
How many nodes do you need? Well in all honest depending on your footage, you could do all of your adjustments on one, like you would with an adjustment layer in Premiere Pro. However, if you are shooting in a Log format I would recommend having three nodes. I will go into that a little later in this tutorial.
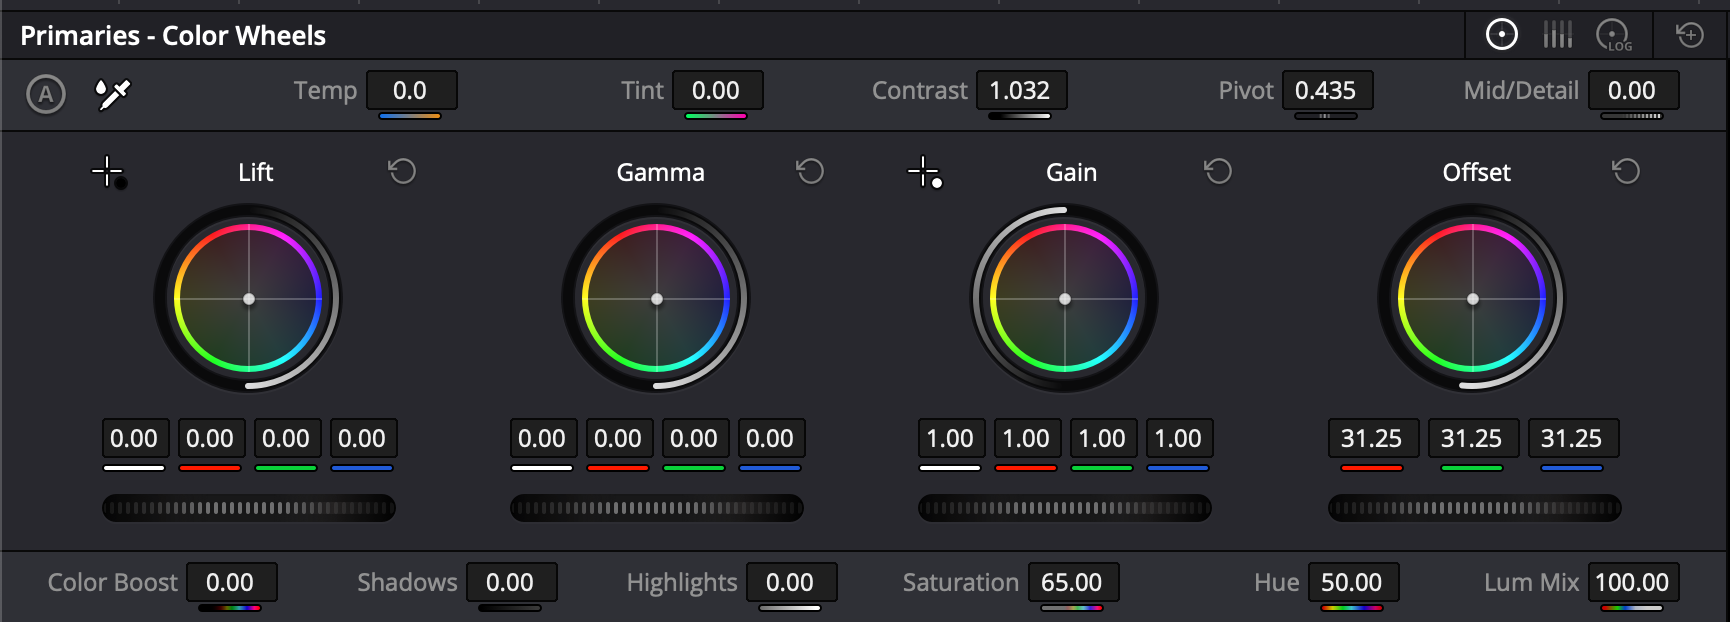
So how do you make simple adjustments? On the bottom left you will see gain, gamma and lift along with offset. Gain is your highlights, Gamma is your midtones and Lift is your shadows. Below the colour wheel you will see a dragable panel, you can use this to change those parts of the image. The Offset is the whole image, so you can use this part to effect the exposure of your image overall. The colour wheels can adjust the look of your image, for example if you wanted an orange and teal look, you might move the colour towards the teal in the Lift and the Gamma towards the orange. I would suggest playing about with this to see how this works. To reset the colour double click on the dot and it will revert back to the centre.

To adjust the white balance, just above the colour wheels you will see temp and tint. To the left of that there is a colour picker, if you select this, you can use this to choose a neutral grey colour or white in your image and this will adjust your white balance to something that is accurate. I use this to have a good starting position and adjust using the temp and tint manually.
Next to this you have contrast, this one is pretty self explanitory, but adjusting this will add/reduce contrast that you have in your image. And next you have saturation.
These should be all you need to get started with adjusting your colour, but I will go into a flow you might use if you are using a log format. So to start I would create 3 nodes, by right clicking, adding a corrector node, then drag this onto the line that is going across the panel.
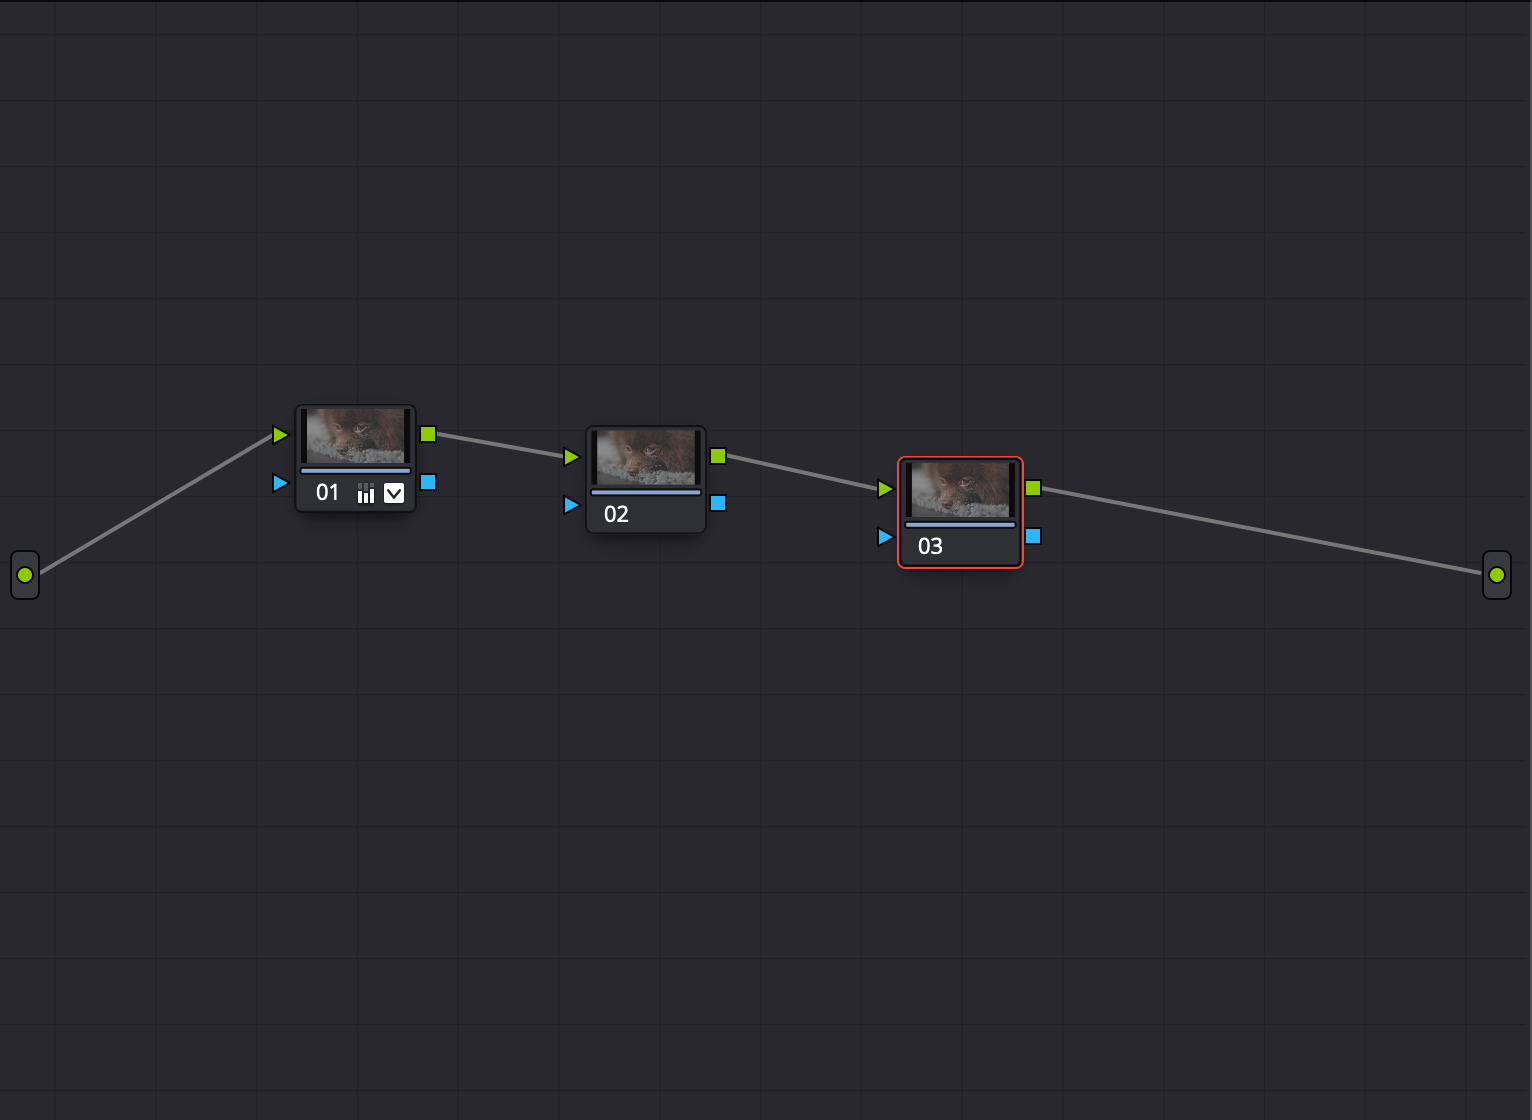
The first node will be to adjust your “primaries”, this is essentially making sure your white balance and exposure is correct. The second node is for your “secondaries” which would be sharpness, contrast and saturation. The third node, is your colour transformation, this is where we will convert your Log footage to rec709. Rec709 is essentially what your footage looks like when you don’t shoot in log.
The reason we do it in this order is because once you transform your footage into rec709 the colour space is more compressed and you lose the flexability you get with the log footage.
So let’s start right to left on the nodes, when you select that 3rd node, on the right hand side you should see an effects panel, if you don’t then enable it by pressing effects on the top right.
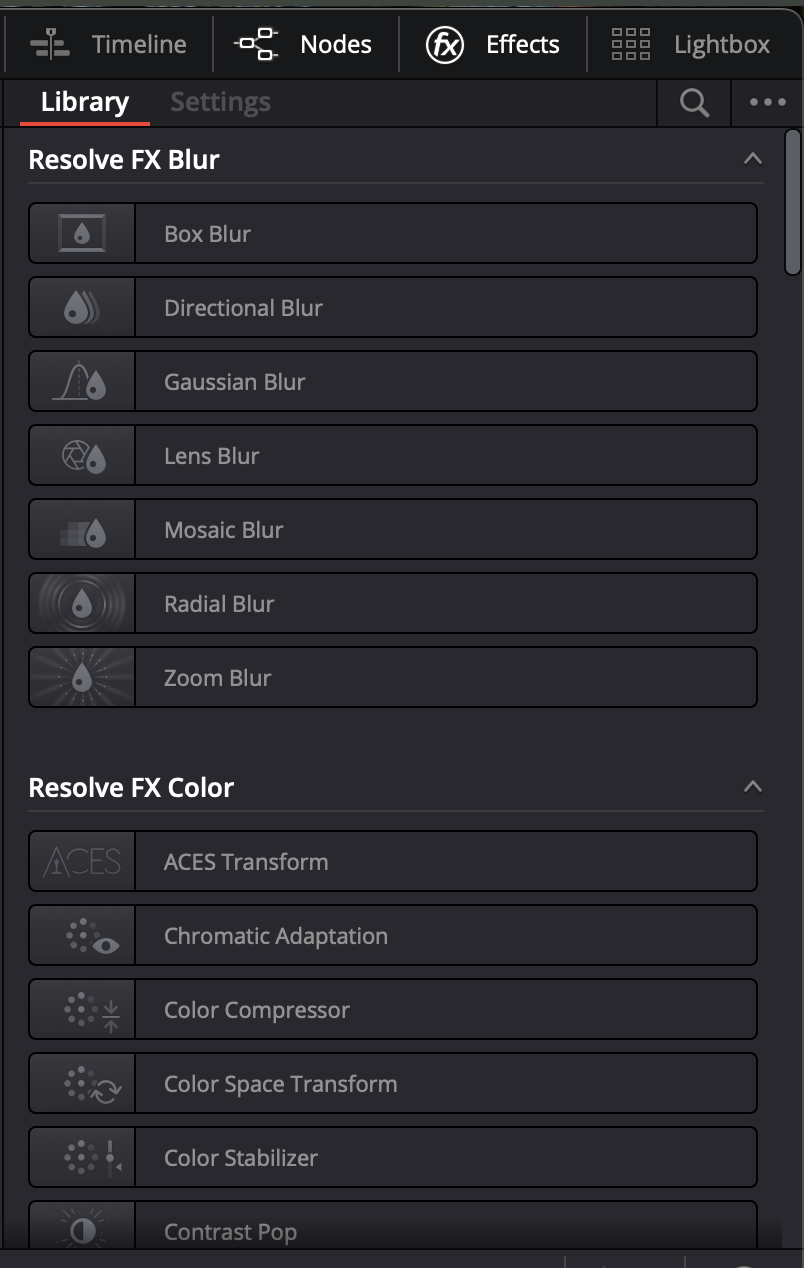
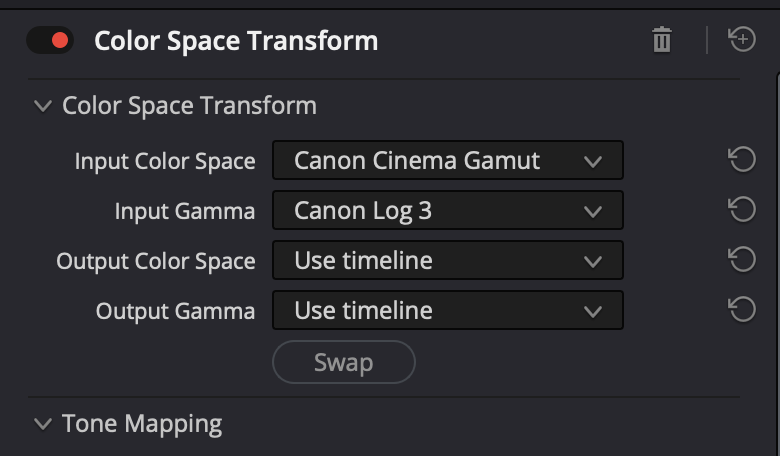
Now search for “color space transform”, drag this on to your third node. You will see four drop downs, we only need to consider the first two. Depending on the camera you are shooting with you need to choose the related options e.g. if you are shooting on Sony in the first one you will choose Sony S-Gamut, and in the seond Slog-3. If you’re using an iPhone with Apple Log, choose rec2020 and then Apple Log. I shoot Canon so the image is from a Canon R6ii. The output space is your timeline, so we don’t need to adjust those as they are set from the settings we did right at the start of this setup.
You should see your footage now isn’t looking so washed out. You should now see where you possibly need to make adjustments. So on your first node you may need to use the offset to reduce or lift the overall exposure, or play with the individual dials to make specific changes to the shadows, mids or highlights.
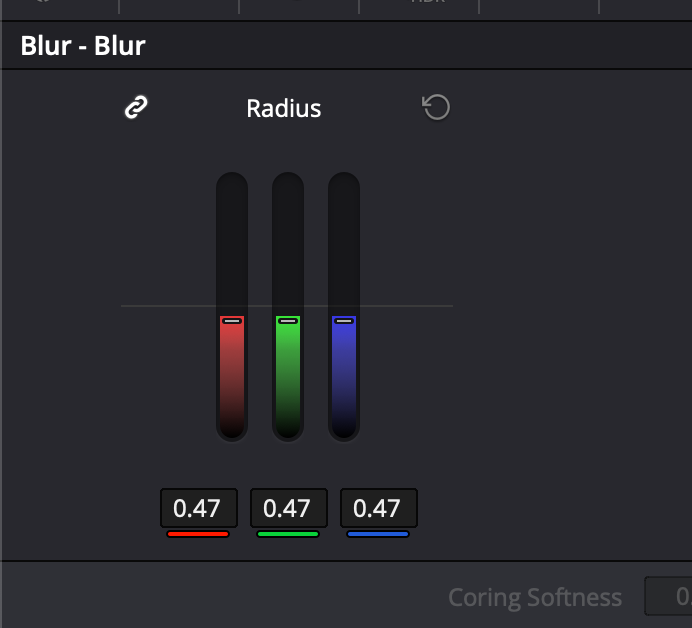
You may be done here, but if you want to make any adjustments to your contrast, saturation or sharpness, this is the place to do it. I haven’t covered sharpness yet, but when you shoot in Log your footage will lose a lot of sharpness and you usually have to add this back in. So select the droplet icon (blur and sharpness) from the middle navigation.

You will see three columns, but you only need to concentrate on Radius. When you drag on one of the gauges, it should adjust all three. So the lower you go the more sharp your image will be and the higher the more blur you will introduce. You should only need to drop this to 0.47 to get the amount of normal sharpness back into your image.
This is probably the most simplistic grade you would need to apply. It seems like a lot of work, so how do you apply this to all clips? The way I like to do this is right clicking the preview image and hitting “save clip” this adds a clip to your gallery. Using this you can drag this onto other clips in your timeline and make indivdual changes where required. You can export this clip in the gallery as a LUT for future reference by right clicking it and hitting export.
Exporting
So this will 100% depend on your context, but for me most of my work is on Instagram and these settings seem to work pretty nicely across the board. Instagram especially is quite agressive when it compresses your video, so the idea will be to get your video to it’s smallest size without losing quality. This doesn’t apply to YouTube so much but it is still worth doing to avoid having large videos stored locally as well.
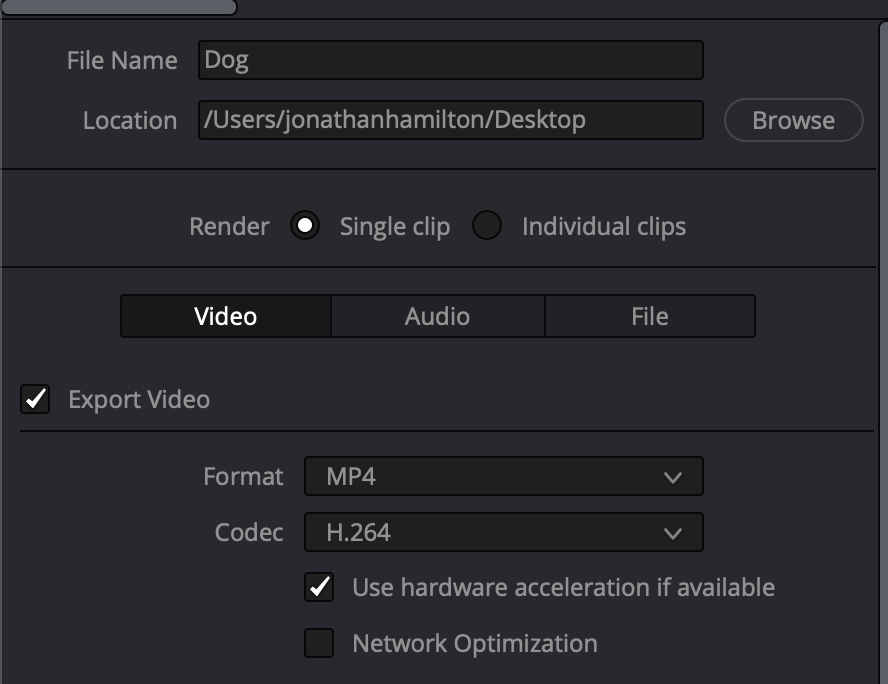
If you are ready to export, go to the rocket icon on the bottom tab navigation. You will see this screen.
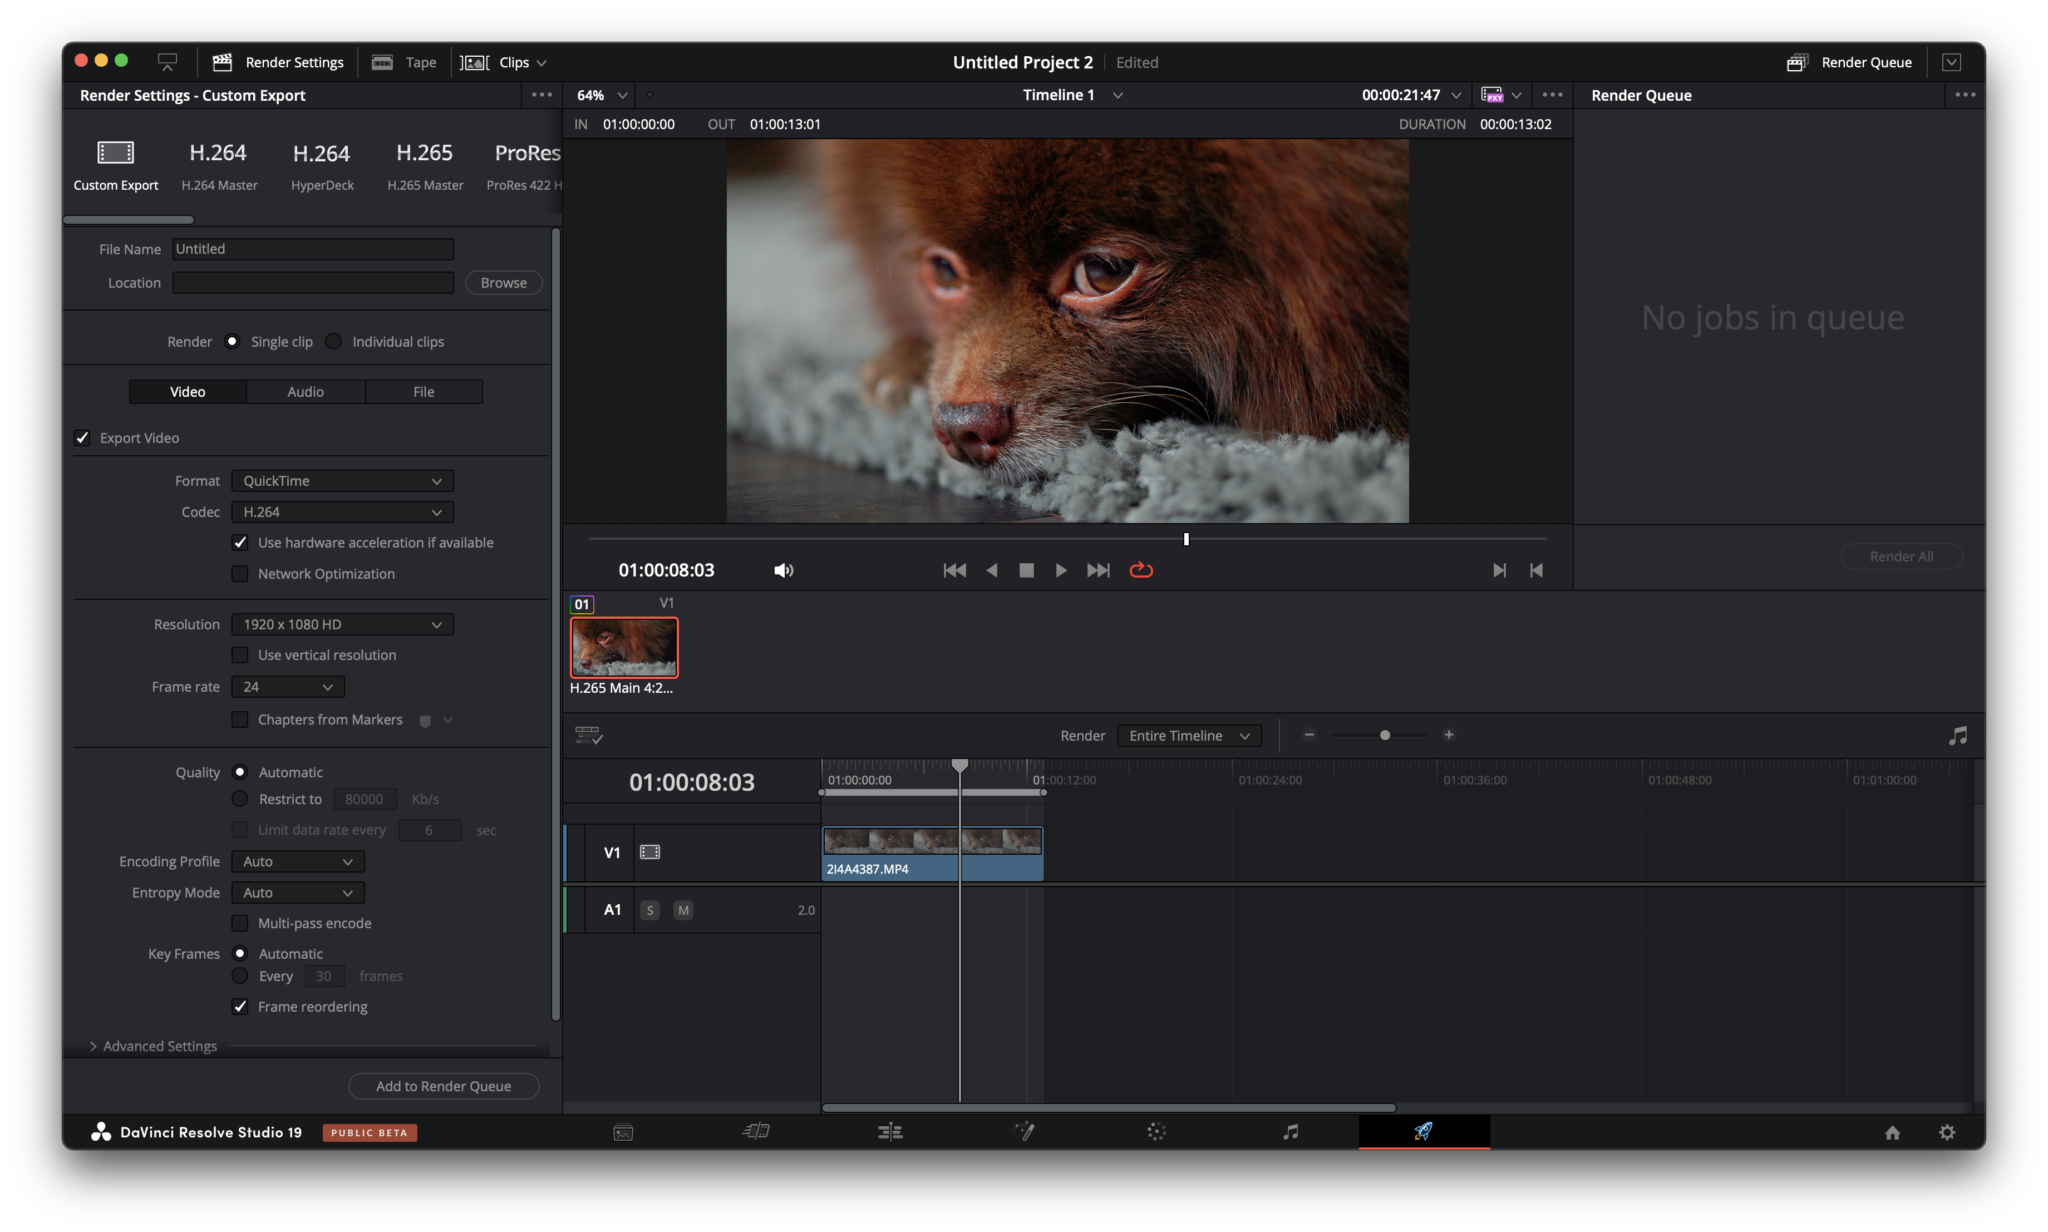
First thing you want to do is choose where you would like to export and name your export if you haven’t already. We now need to select the format we want to export, I recommend using these setting to export as an mp4, and keeping the codec as H.264 (should be default).
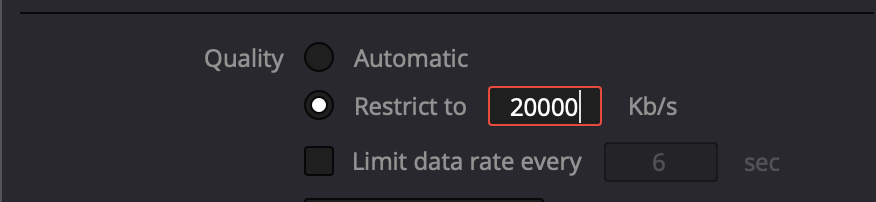
So this is the fun bit, you will see the Quality setting, change this from ‘automatic’ to and ‘restrict to’ from 80000 to about 20000, I have found 20000 to be still on the higher side but has worked pretty well for me so far. This compresses your file to a point which is close to where it’s hard to go much further so when you do upload to Instagram your footage should look much crisper than keeping it higher. You can test this and compare the differences.
Now expand the advanced settings and hit full, this just ensures data levels are set to full, this ensures the same quality throughout the video.

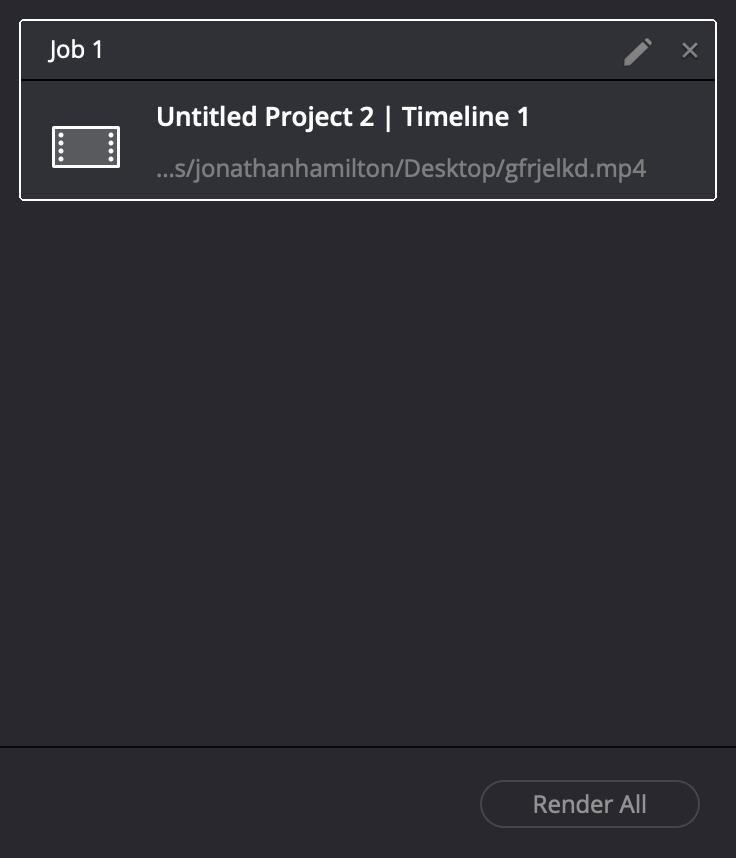
Now hit add to render queue and you should see your video is now ready to be rendered. Hit the ‘render all’ and once it has exported you’re done!
This is more or less my workflow which I have found the easiest to do. It can be intimidating but this workflow allowed me to edit, grade and publish videos in 30 minutes when I was working on sporting events. You can see my Instagram for more examples of this kind of work. I am down to help and my dm’s are open on Instagram and Twitter so I can do my best to help with specific problems.